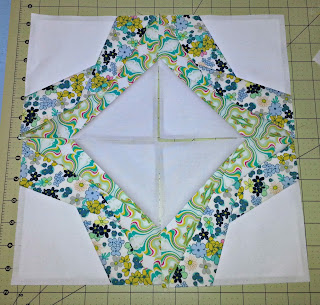
For this tutorial we will be using Icky Thump by 627Handworks. You can visit her blog and download the pdf file. You will need to print 4 copies for one block. I have chosen to use Kona White as my background color and am using two prints from the Carnaby Street fabric line by Pat Bravo for Art Gallery Fabrics. For each of the 4 sections I have cut 2 Kona White 5 inch squares, and 2 each - 2.5 x 7.5 inch strips of the other two fabrics. So now we are ready to get started.
First cut out your foundation papers along the dotted line edge.
Next fold the paper along each of the lines.
Next we are going to lay and pin our first piece in place. If using a print you will want to lay it right side up on the backside of the foundation piece. Pin in place.
Then we will fold the foundation paper back along the line between sections 1 and 2. Using a ruler trim fabric to 1/4 inch seam allowance. You will then lay your next stripe of fabric right side down on top of the first fabric lining up the long edge.
Now stitch along the line between sections 1 and 2, making sure to stay on the black line and using a short stitch length (this would be about 1.5 on most newer machines). The short stitch length will make it easy to pull the paper pieces off at the end. Once you have stitched on the line finger press the strip back. Do not use an iron as the fabric can easily get distorted.
Now you will repeat these same steps for each section of the block.
Once you have sewn on all the pieces, turn the square over and trim the edges.
Now arrange your sections and decide what look you want to your for your block.
Finally, sew your squares together using a 1/4 inch seam allowance.
There you have it, easy peasy. I hope this will become a regular part of your quilting. It is really enjoyable and once you get the steps down it will become second nature to you. I bet you will even try your hand at designing your own pattern.
Here is another quilt I am working on that started with a Foundation Paper Piecing pattern. I used Ice Star by Sarah Bailey and more Carnaby Street fabrics by Pat Bravo for Art Gallery Fabrics.
Well that's it for today. I hope you have a crafty type of day!


Looks great! I don't mind foundation piecing, but it can be frustrating. Enjoy your week end
ReplyDeleteIt was very fustrating at first for me also, but after learning these tips and tricks it all made so much since. Thanks for stopping by my blog!
DeleteI set this block for my do.Good.stitches bee last month and it was interesting to see how everyone dealt with the challenge of paper piecing. I wish this tutorial had been around when I set my October bee... but I have book marked it for next time.
ReplyDeleteOh well I hope it come in handy next go around. Thanks for your sweet comment.
DeleteI have never thought to fold all lines first. Interesting. Love the different layouts with this block.
ReplyDeleteIt really helps me to see as where my next piece goes and the trimming th seam allowance helps to line up the next section. Thanks for commingby my blog!
DeleteWhat a great block and fun tutorial :) I actually find I need to use an iron for pressing when I'm using this method of paper piecing, I just don't get the same accuracy if I finger press. Thanks for sharing and for linking up! :)
ReplyDelete